I've always had this vision hosting my Next.js sites on my own terms, far away from the clutches of Netlify, Vercel, or Render. But how? Then, as I was casually scrolling through X (aka Twitter’s alter ego), bam! I spot people raving about Coolify. It was like finding the cheat code in a game! So, what’s this Coolify magic all about?
What is Coolify?
Coolify is a free, open-source tool that allows you to easily self-host applications, databases, or services (like WordPress, Formbricks, and Grafana) without needing to manage servers yourself.
Why Choose Hetzner?
Two words: wallet-friendly. 💸 Plus, Hetzner recently added a one-click install for Coolify, which makes setting it up a breeze like literally zero hassle.
What You Need Before We Dive In
Make sure you have these goodies:
- A domain name (I grabbed mine from Porkbun, cause it’s fun to say 😂)
- A Hetzner Cloud server (I went with the €4.51/month option, nice and affordable)
- A Git repository for your project (GitHub or GitLab—pick your poison)
Step 1: Setting Up Your Domain
For domains, I recommend Porkbun or Namecheap because they’re easy on the wallet and reliable. No one likes spending more than they have to, right?
Step 2: Create a Hetzner Server
Sign in to Hetzner (ref), and here’s what you need to do:
- Go to Project > New Project, give it a name (something snazzy), and click Add Project.
- Open the new project, click on Create Resource at the top right, and select Servers.
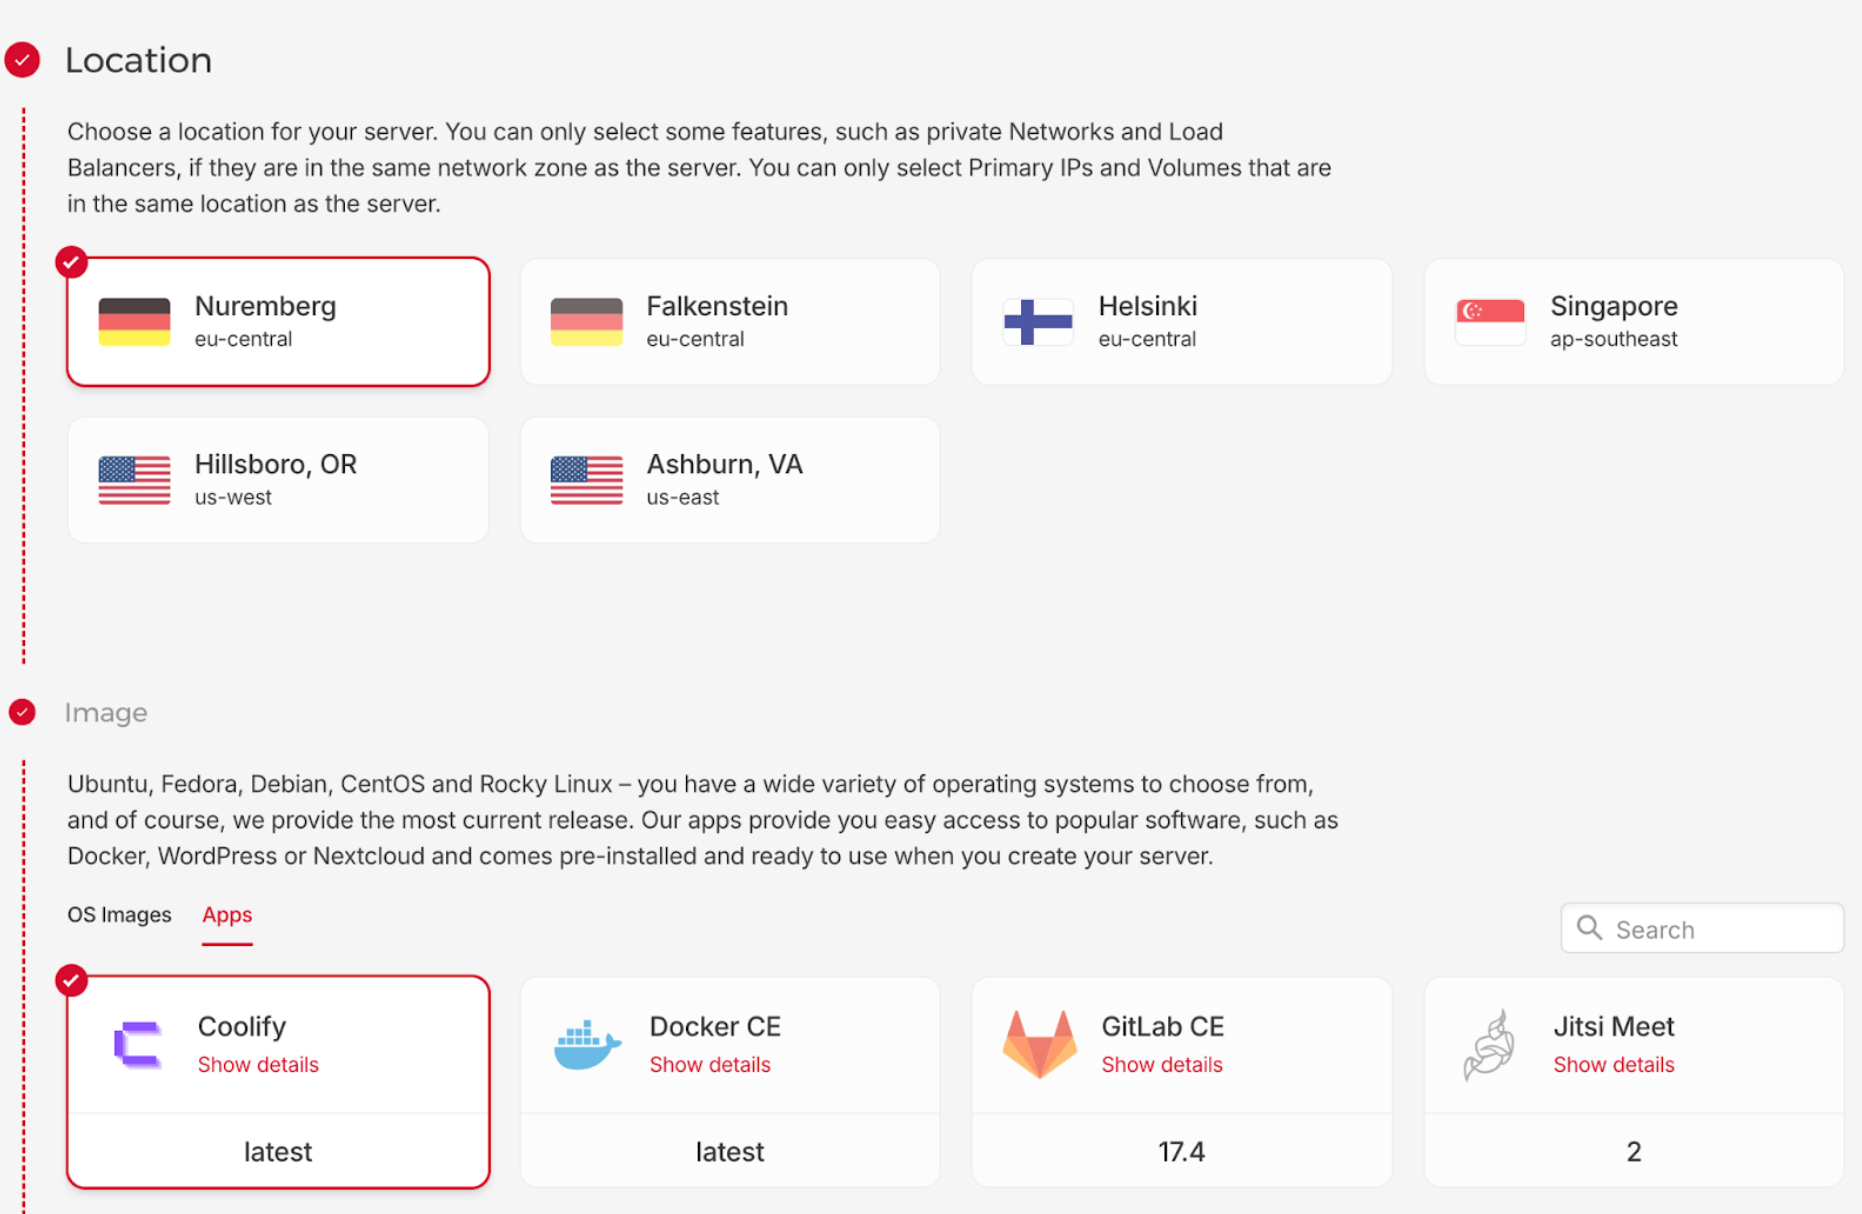
Server Configuration:
- Choose Server Location (note that prices vary by location).
- For the Image, go to the Apps tab and select Coolify. It’s literally that easy.
- Choose Server Type based on your needs.
- Set Volume Storage to at least 30GB. I added 40GB for a little extra wiggle room (cost me €1.76/month).
Minimum Specifications for Coolify: 2 vCPUs, 2GB RAM, and 30+ GB storage.
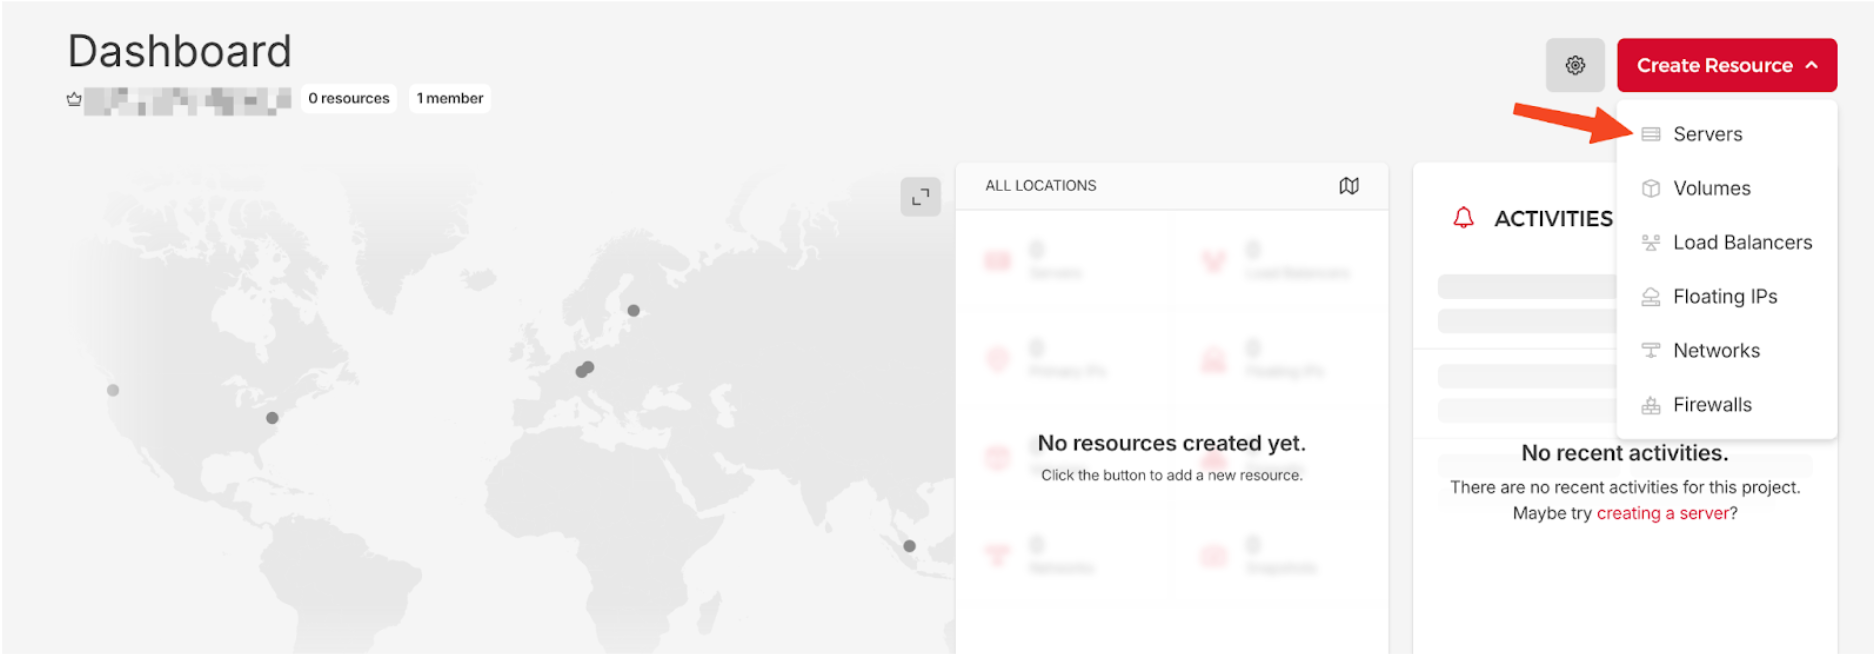
Once configured, click Create and Buy Now.
Step 3: Say Hello to Your Server
Hetzner will email you the IP, username, and password for your server.
Using your terminal, SSH into the server with the following command:
ssh root@<your-server-ip>
Replace <your-server-ip> with your actual IP. It will ask for the password from Hetzner, and then you'll be asked to set a new root password. Pick a good one and write it down somewhere no sticky notes, please. 😅
Coolify will automatically start installing. You’ll get a link to the dashboard, which will look something like this:
http://<your-server-ip>:8000

Step 4: Finish Up the Coolify Setup
Follow these steps in the Coolify dashboard:
- Open the link to your Coolify instance and complete the registration.
- Click Get Started and just keep following the prompts it’s all smooth sailing.

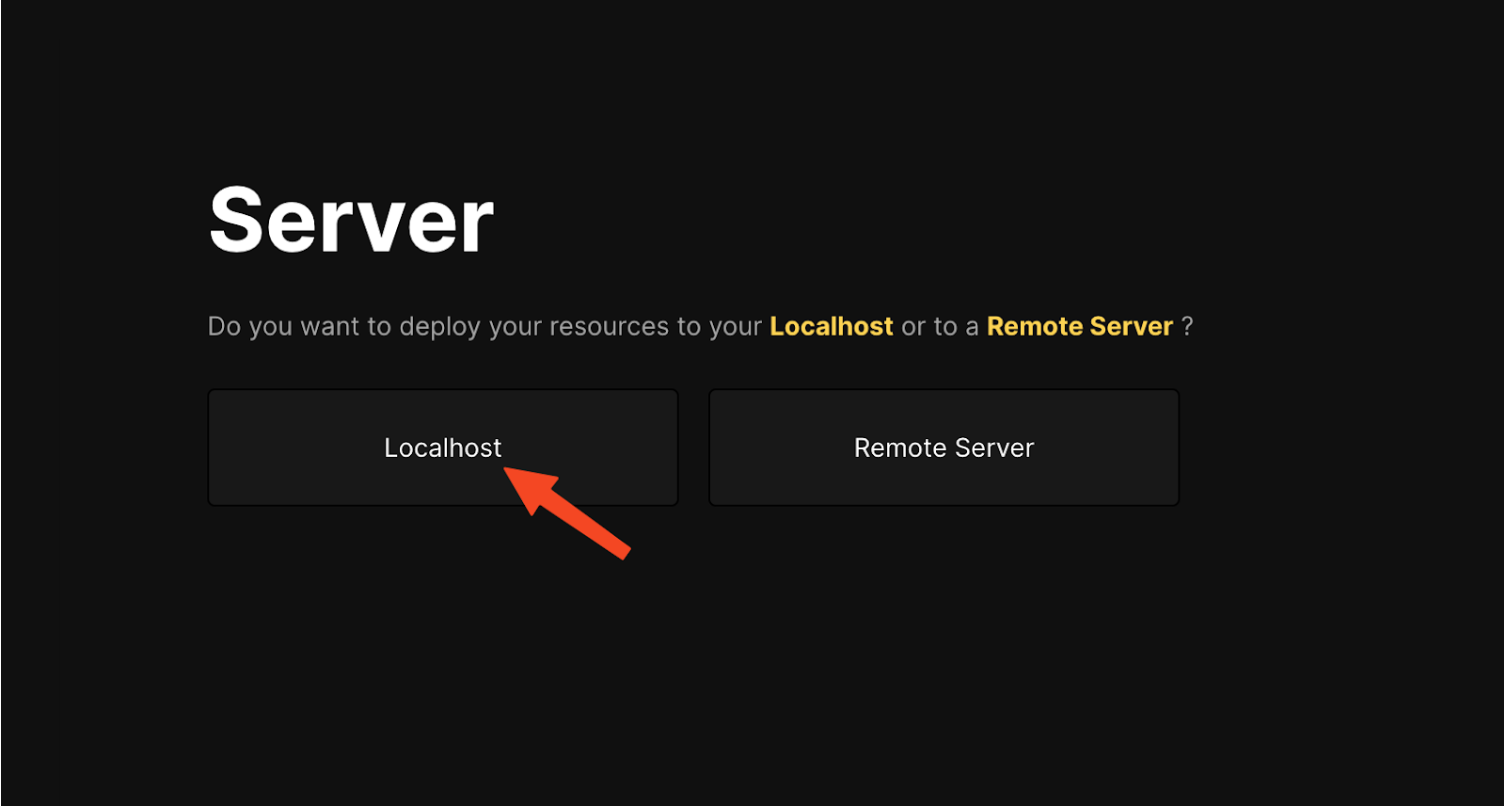
- When prompted, select Localhost as the server.
- Name your project and continue to Add Resource. Link your Git repository (using a public one for this example).
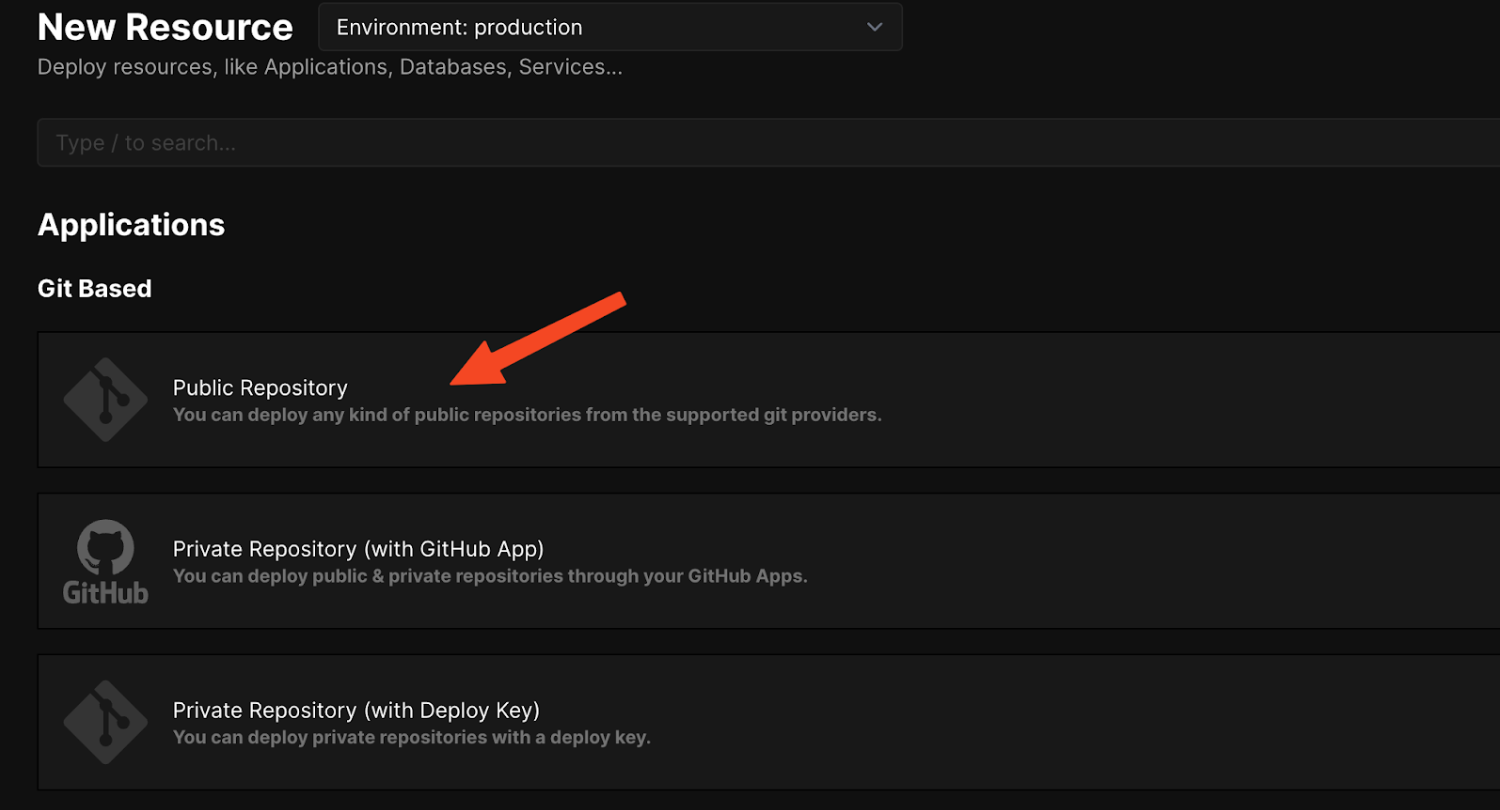
- Click Check Repository to verify it.

- Select localhost when asked which server to use, then proceed to Deploy and let Coolify build and serve your app.
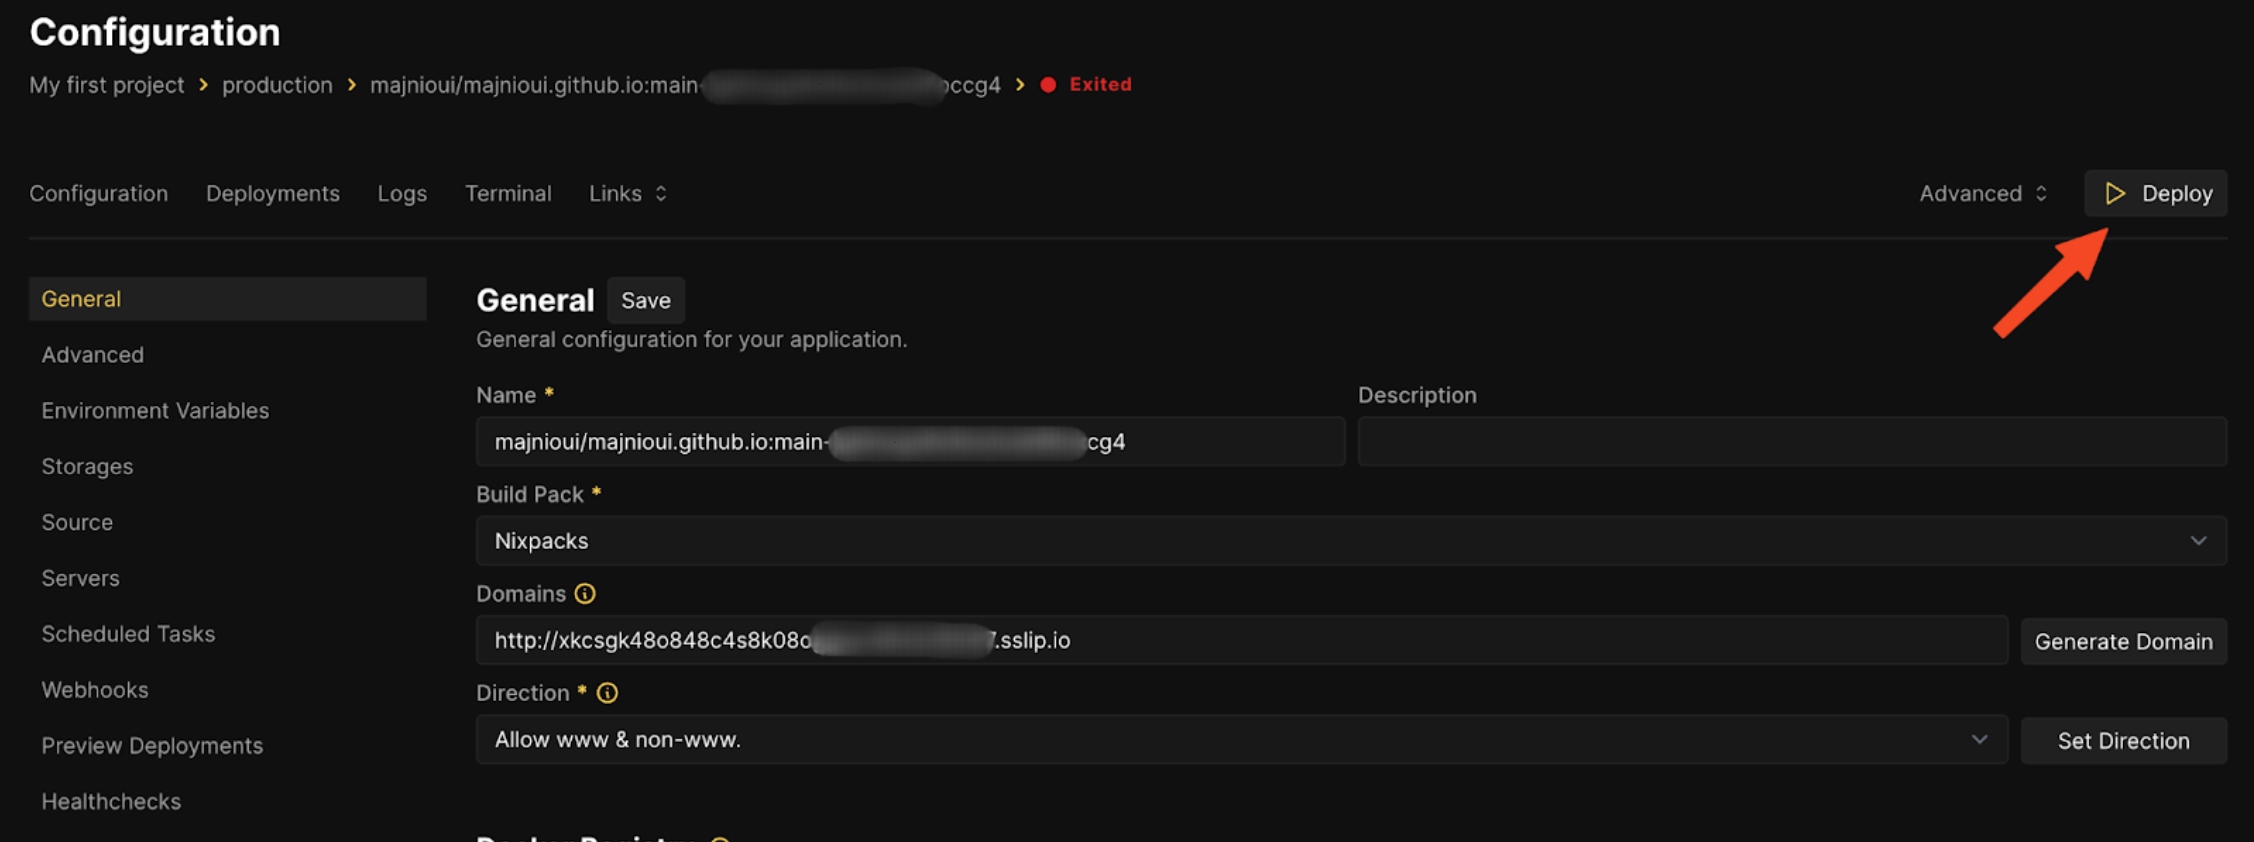
If all went well, your website should be live on the link generated by Coolify.

Step 5: Setting Up a Custom Domain for Coolify
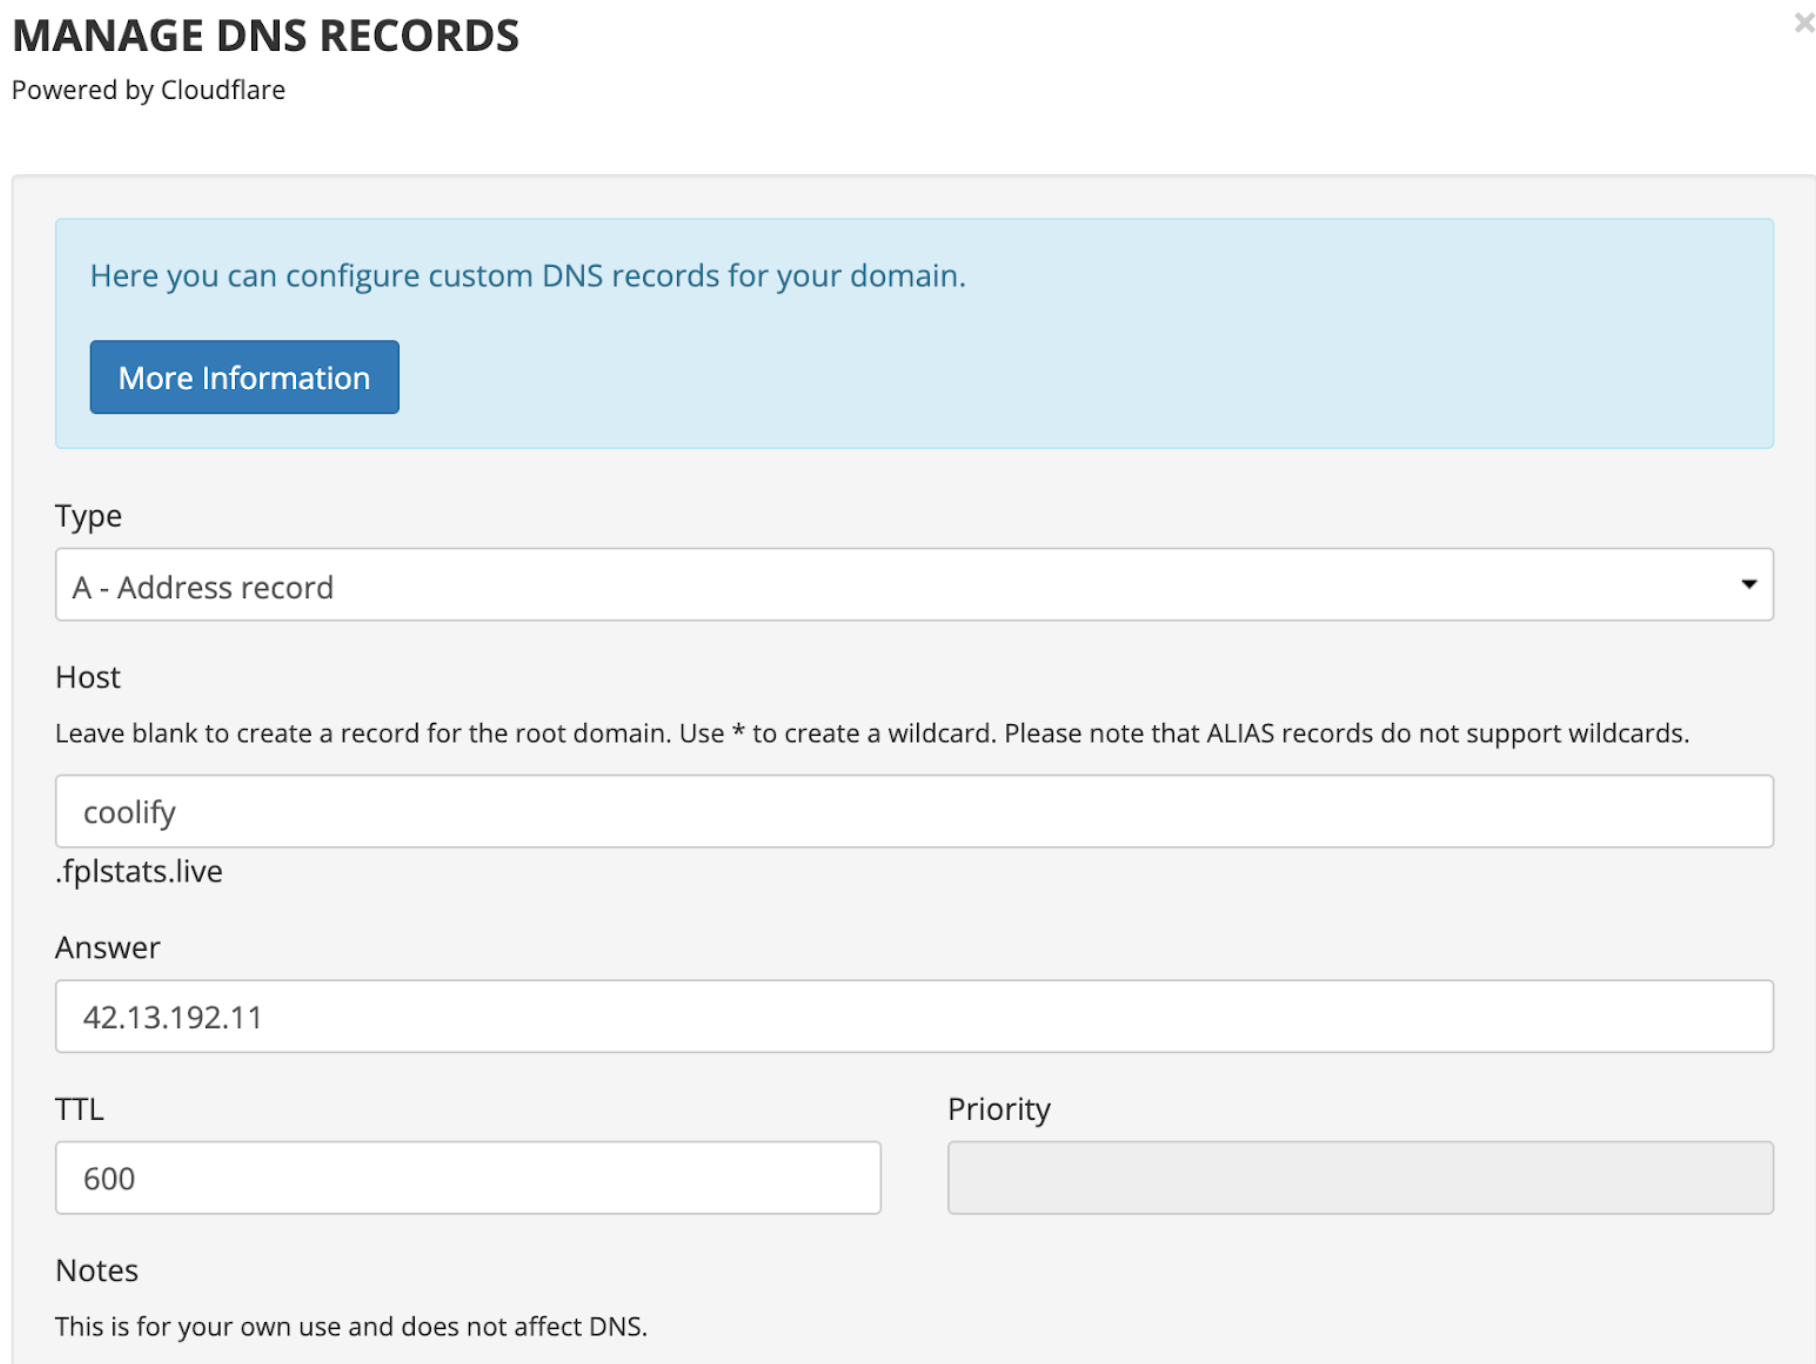
Head over to your domain provider’s dashboard and tweak the DNS settings:
- Add an A record pointing your domain to your Hetzner server’s IP.
- In Coolify, go to Settings and set the instance’s domain to
https://coolify.<your-domain>. For example, if your domain is FPLStats.live, usehttps://coolify.fplstats.live. - Hit Save and wait a few minutes for the DNS to propagate.
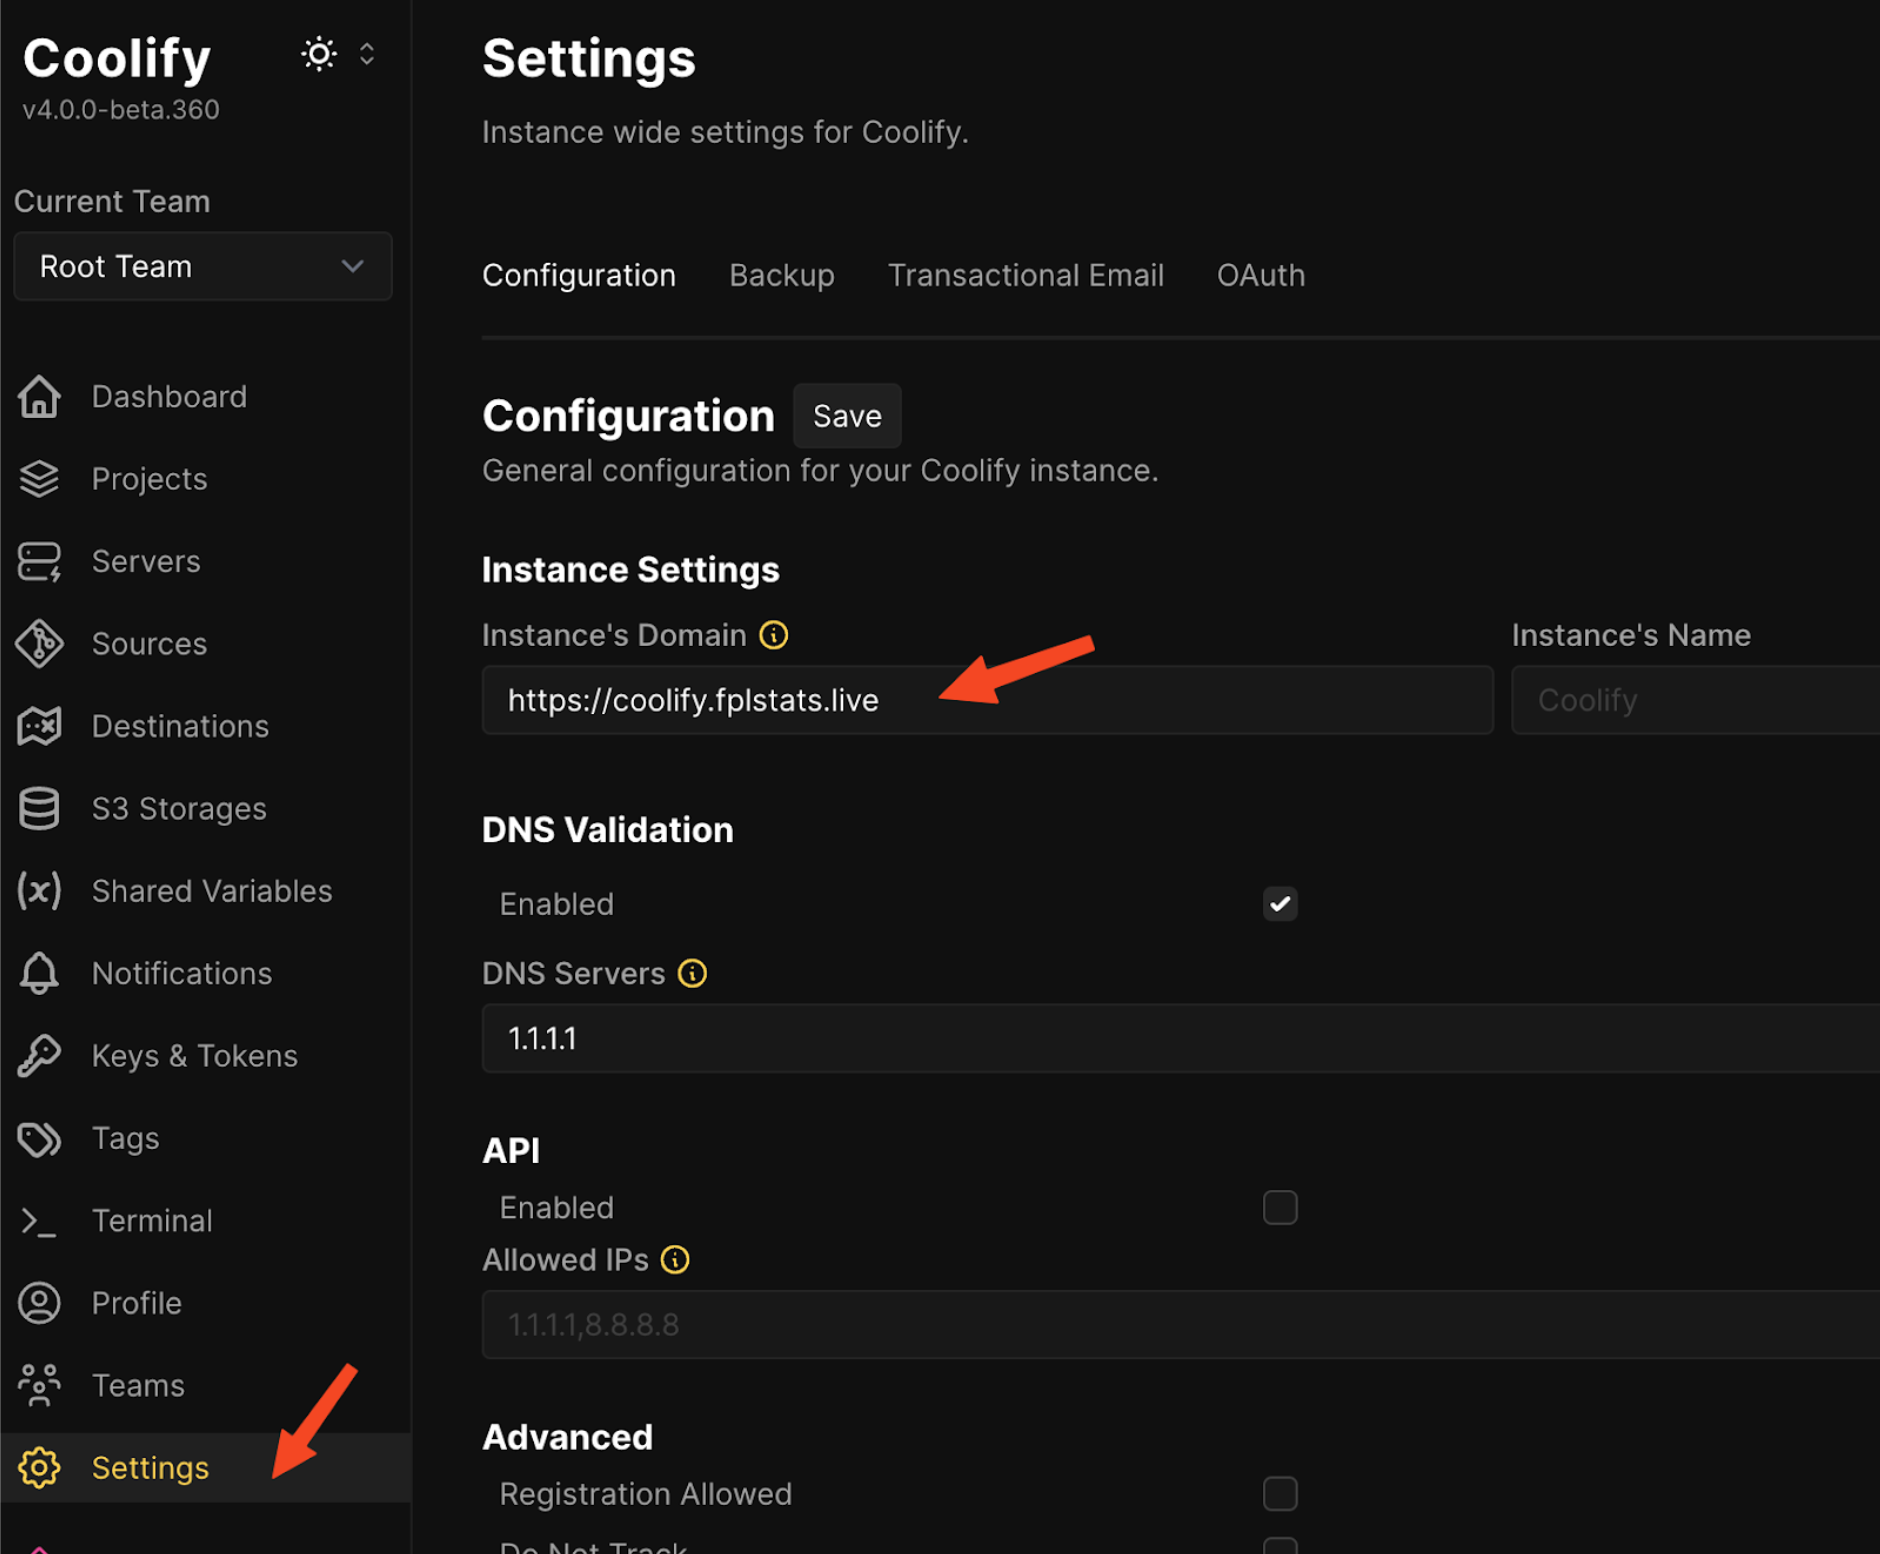
Now, you can access Coolify using your custom domain, hence https://coolify.fplstats.live instead of http://<your-server-ip>:8000. No more IPs to remember!
Step 6: Link Your App to the Domain
- In Coolify, navigate to your project’s configuration dashboard.
- Replace the autogenerated domain with your custom one. Make sure to include both www and non-www versions, separated by commas.
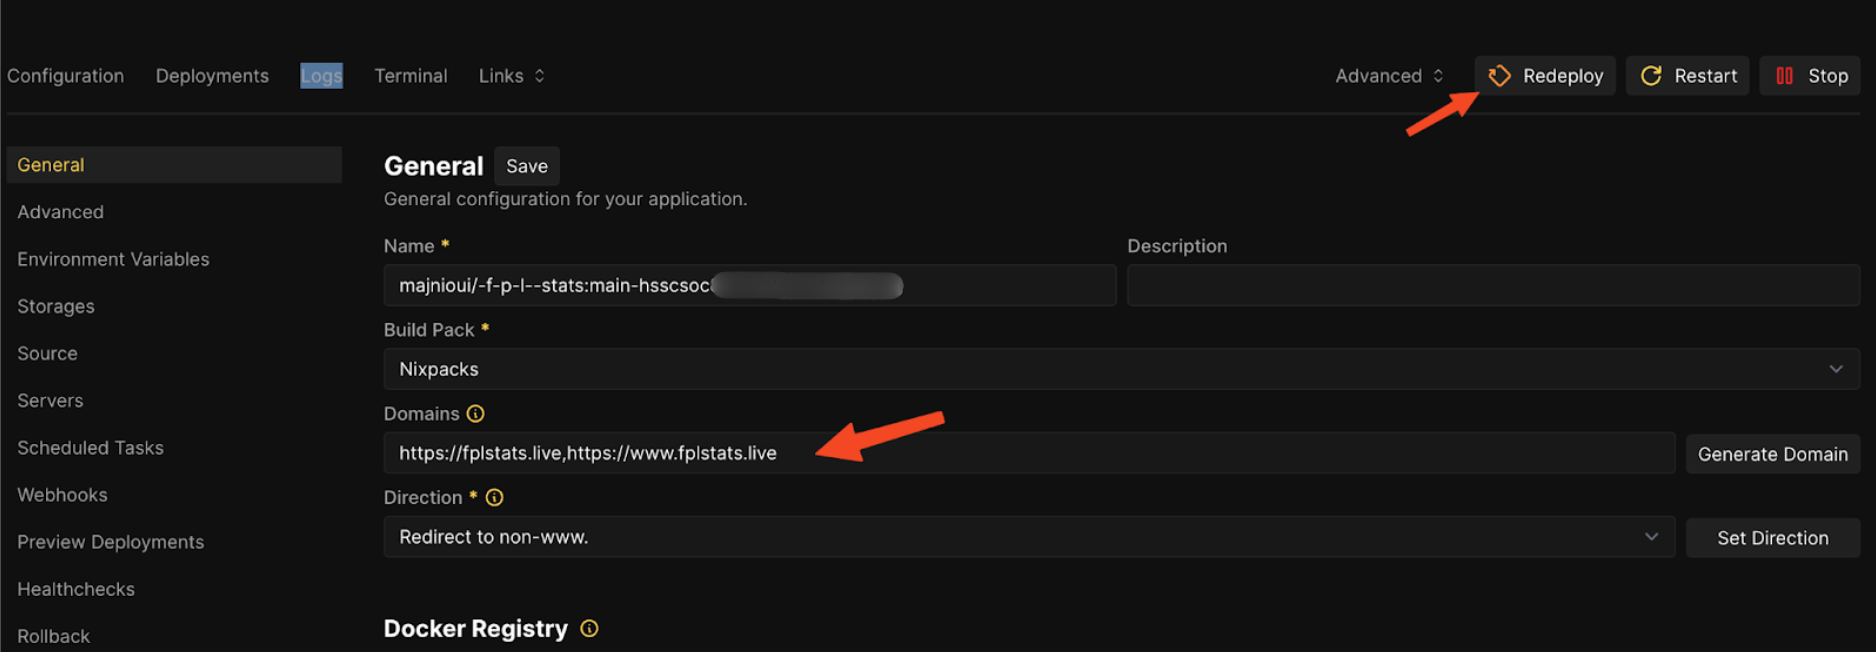
- Click Save and then Redeploy to apply the changes.
- Now back in your domain’s DNS settings, add A records for both the root domain and www subdomain, pointing to your server IP.
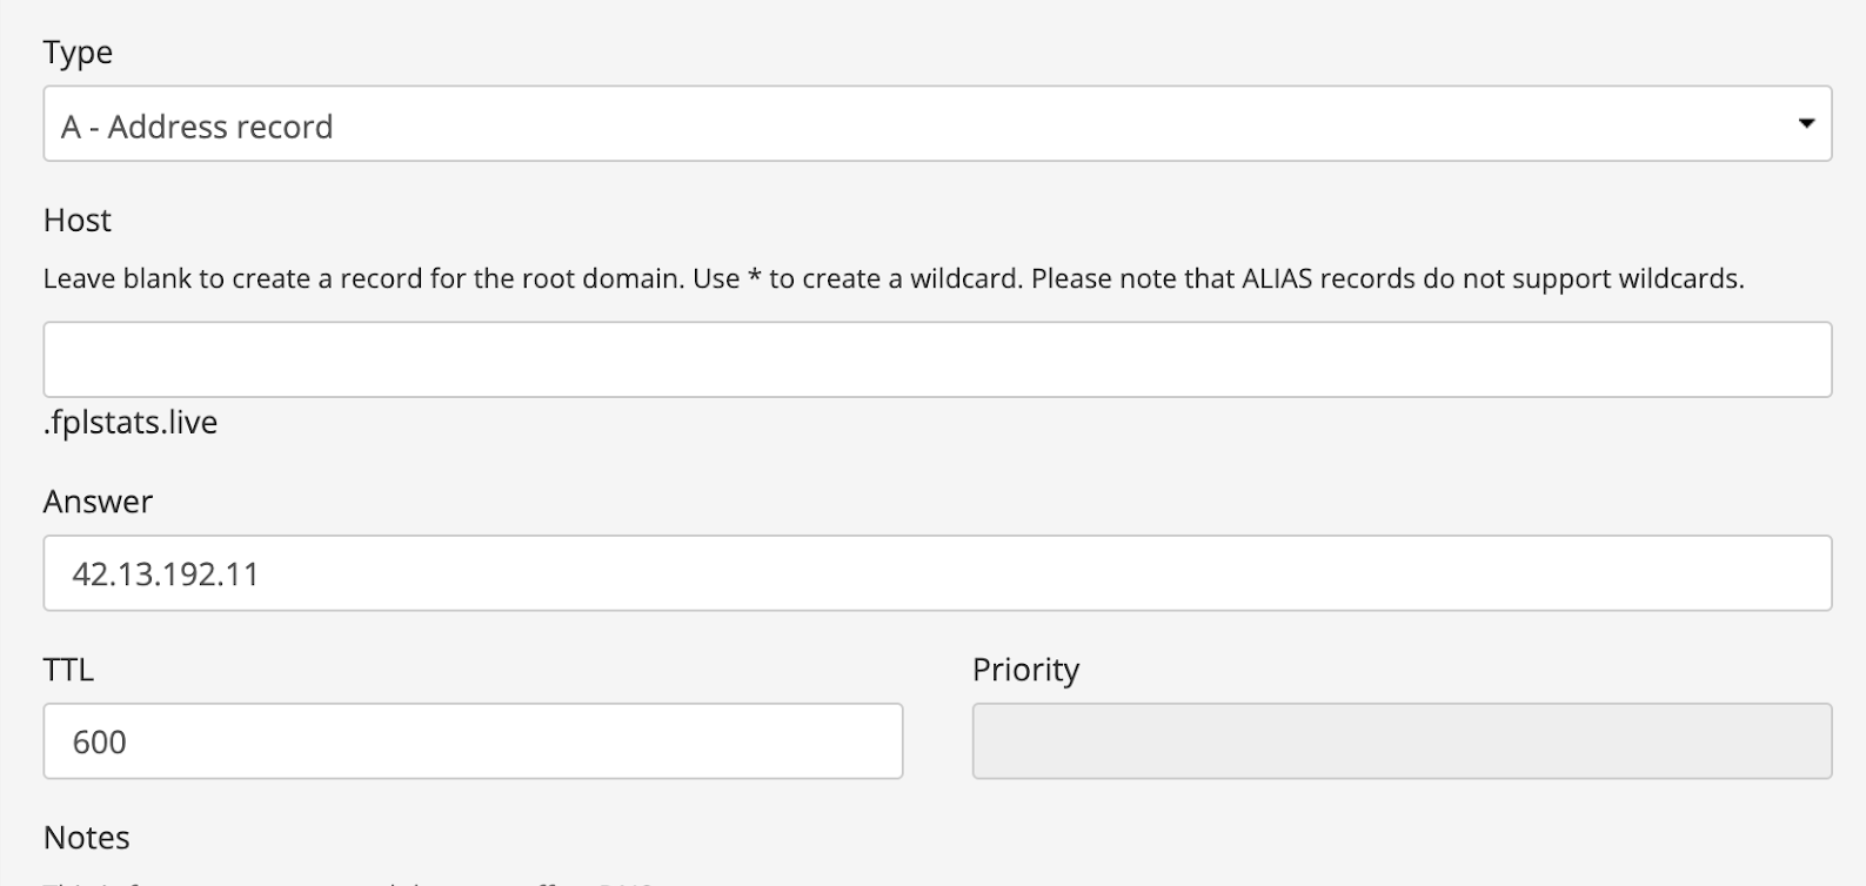
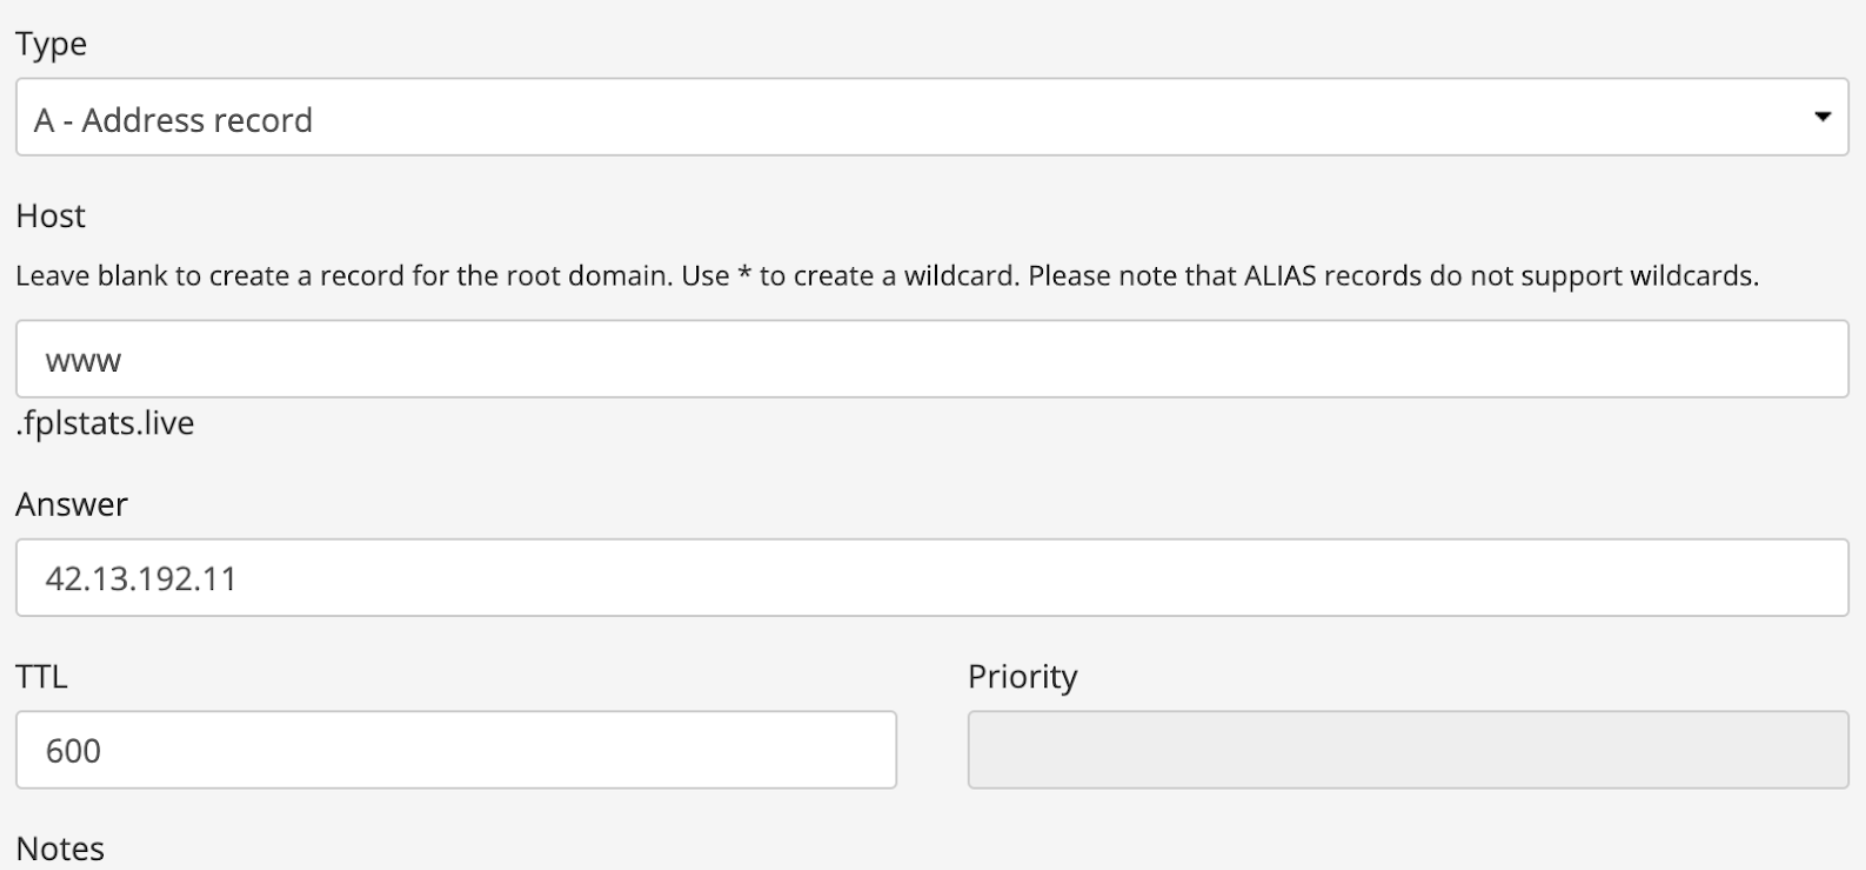
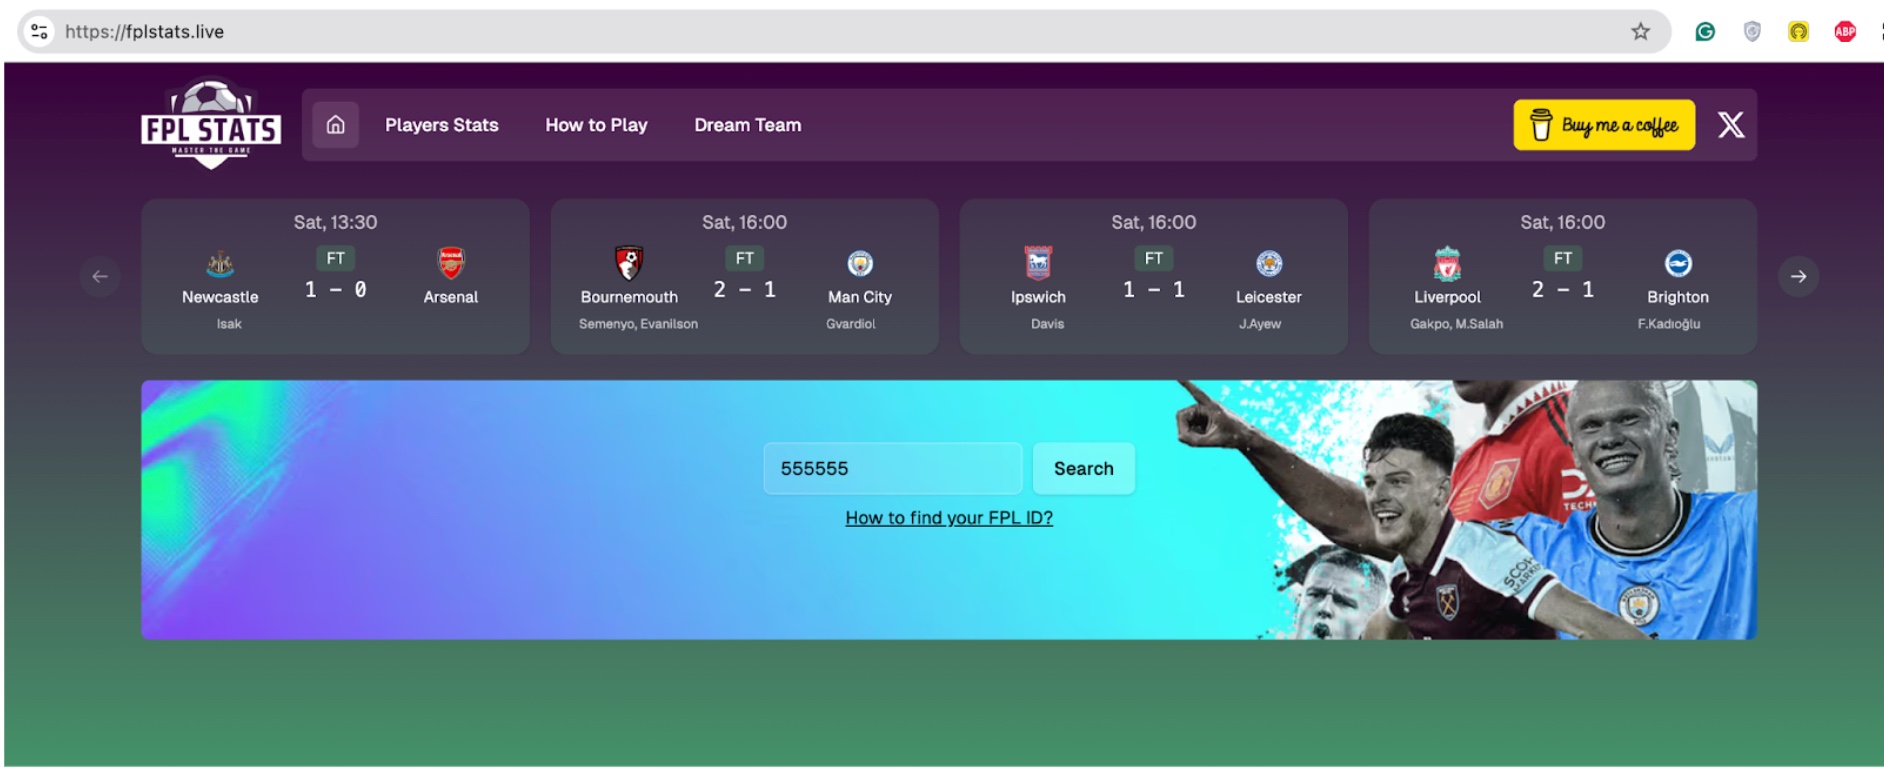
- Wait a few minutes, and boom your app should be live on your domain!
Step 7: Set Up a Firewall (Because Security Matters)
For added security, set up a firewall on Hetzner:
- Go to Firewalls in the Hetzner dashboard and create three inbound rules for common ports (e.g., 80, 443, and SSH).

- Apply these rules to your server under the Resources tab.

- Once the firewall is enabled, Coolify will only be accessible via your custom domain
https://coolify.<your-domain>, plus HTTPS is all taken care of by Coolify. No need to stress over SSL certificates. 😊
The Grand Finale
And there you have it, folks! We created a Hetzner server, set up Coolify, linked a custom domain, and configured firewall rules. Now you’re all set to self-host like a pro.
Hope this guide helped you out! If you have any questions or just wanna chat about tech stuff, hit me up on X (Twitter): @m_majnioui.